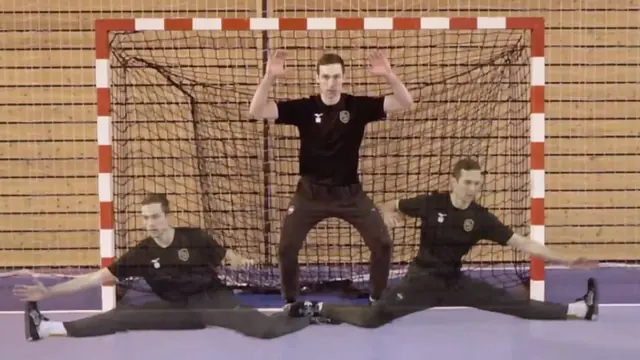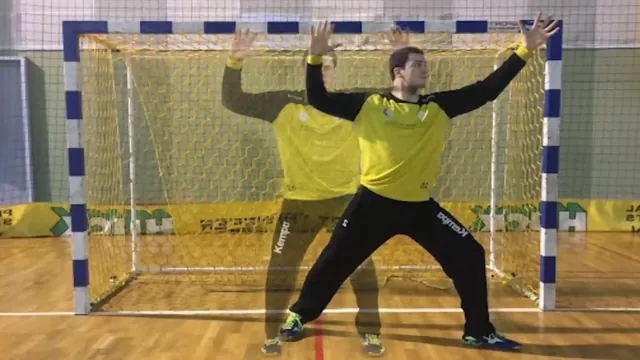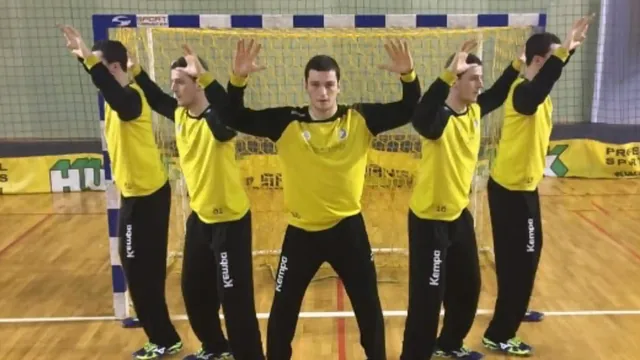
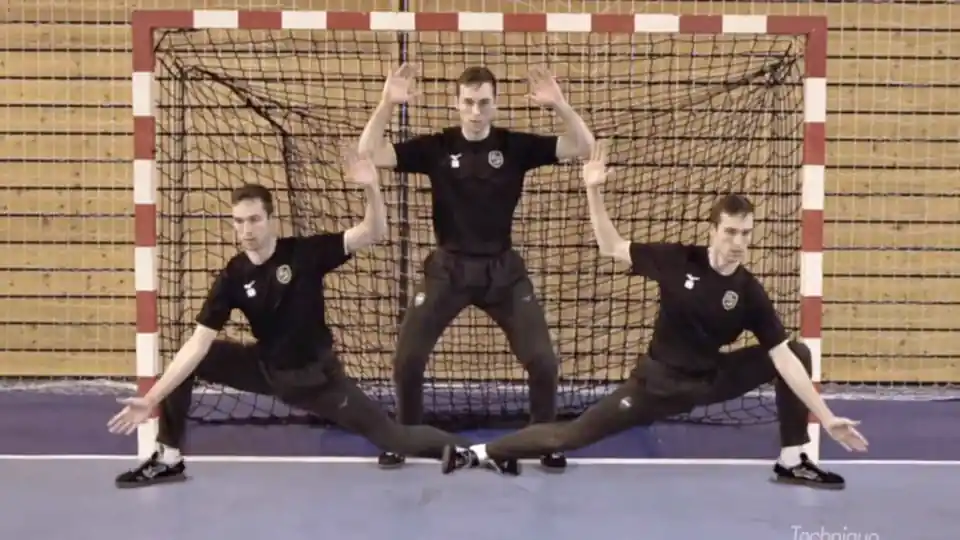
Picture a training shot travelling towards the bottom corner. The goalkeeper reads it, pushes sideways and stretches a leg towards the ball. The foot arrives. The hand follows a moment later. Between them, the ball finds a way through.
On the next attempt, the goalkeeper tries harder. More effort, a bigger push, the same gap.
If you recognise that sequence, look at the route your body takes before deciding you need faster reactions. In the low-save technique I teach, lowering the hips early helps bring the hand and leg into the save together. The useful question is simple: where did the movement become longer than it needed to be?
Follow the hand back to the start
Replay the example from the goalkeeper’s stance. The foot begins near the floor. The hand begins much higher. They have different distances to travel, but they need to contribute to the same moment of contact.
Now watch the hips. If the goalkeeper travels sideways while staying upright, the hand has barely begun its journey down. Only after that sideways movement does the body lower. The goalkeeper has made the save into two separate actions: across, then down.
That is a pattern I look for in video analysis. A late hand can be the visible end of a problem that started elsewhere. Telling the goalkeeper to move the hand faster may leave the underlying movement unchanged.
It also explains why a save percentage alone cannot tell us what to correct. The number records the outcome. The video lets us examine how the goalkeeper reached it.
Change the route
My cue is to lower the hips as the movement towards the low ball begins. Think down and towards the ball together. The movement should be controlled, with the trunk following towards the save, rather than an upright journey followed by a late collapse.
Bring the reaching hand towards the ball while the leg opens into the available space. Aim for a coordinated finish. The appropriate depth and reach depend on the goalkeeper’s position, mobility and the shot; forcing every repetition into the deepest possible shape misses the purpose.
The other arm matters too. In our example, it may have flown out behind the goalkeeper for balance. Keeping it available in front gives another option if the ball changes direction. The hands should remain able to adjust as the shot develops.
There is no single arm angle or foot position that works for every low shot. What I want the goalkeeper to understand is the relationship: an efficient route for the body, useful coverage from the leg and hands, and a finish suited to the shot in front of them.
The next repetition has a different job
Return to the training scene. This time, take the ball away for a moment. From the basic stance, move slowly into a comfortable low-save position. Watch when the hips begin to descend and where the hand travels.
A phone recording from the front and side can reveal something that is difficult to feel. Compare the first movement with the second. Did the hips lower sooner? Did the hand take a more direct route? Can the goalkeeper return to a balanced position afterwards?
Add a controlled, predictable low throw when the movement is comfortable. Give the repetition one purpose: coordinate the finish. Then gradually vary the placement and timing so the goalkeeper must recognise the shot as well as perform the movement.
The coach’s feedback should name what happened. “Your hips stayed high during the first step” gives the goalkeeper something to change. After a few repetitions, ask the goalkeeper what they noticed before giving your answer. Learning includes recognising the movement independently.
When a shorter save is enough
A ball close to the foot may need only a compact leg reaction. A shot from close range may leave too little time for a larger low save. The technique in this article is an option for reaching and covering a low ball, not a demand to put the whole body on the floor whenever a shot goes down.
In your next session, film a small group of low shots. Choose one where the hand arrived late and follow it backwards: hand, trunk, hips, starting position. Find the first useful correction, then test it at a manageable speed.
The lesson from the opening scene is something you can now see: the hand did not necessarily need more effort. It needed the rest of the movement to give it a better route.
Related reading: goalkeeper positioning and the sliding technique.